Cultural Tips for Growing Asparagus
In This Guide
Site selection
Plant your garden in a convenient location, where you can check it frequently. Choose an area near an abundant supply of water so you can water as needed easily. Vegetables do best if they receive full sunlight (at least 4 to 6 hours a day). Plant them in a well-exposed area in the garden, where they are not shaded by trees, fences, or walls. Try to plant away from areas that will be watered by lawn sprinklers.
Whenever possible, select a location that is not heavily infested with weeds, especially weeds such as field bindweed, nutsedge, and Bermudagrass that can be hard to control with hand weeding. Also avoid areas that have had previous disease problems.
Try to plant on level ground. Level ground is easier to work on than sloping ground. Vegetables will do well on a wide range of soils; they do best in well-drained soils. If your soil forms a clump when squeezed, then it is too wet; if the soil crumbles easily, it is a good soil to use. Damp soil surfaces encourage snails, slugs, sowbugs, and root diseases; fruit decay and leaf spot diseases may also increase. Soil amendments can make clay and sandy soils easier to work with, and correct soil preparation can improve poor soil.
Adding organic matter (compost, peat moss, manure, sawdust, ground bark) makes clay and sandy soils easier to work with. The soil should be kept at a pH level of 6.0 to 6.5. Lime or gypsum can be added to soils low in calcium.
Soil recommendation
Deep, loose, or light sandy loam; will not tolerate shallow or perched high water tables.
Soil improvement
Any type of soil can be improved with soil amendments. Heavy clay or sandy soils can be improved by adding organic material such as compost, manure, or leaf mold. Texture is an important consideration when choosing an amendment. An amendment that is granular and fine grained is important for container mixes. For gardens, a more coarse-grained amendment can improve drainage and aeration. Work amendments into soil by rototilling, raking, or double-digging.
Soil preparation
The preparation of your soil is just as important as adding fertilizer and soil amendments. Before working the soil, make sure it is moist but not thoroughly wet.
- Use a shovel, rototiller, metal bow rake, or all of them together to loosen the top 1 to 2 inches of soil. Rake the area to remove weeds and old crop debris. Be sure to dig out roots.
- Irrigate the plot deeply to encourage the germination of weed seeds.
- In a week or two, after a substantial number of weeds have germinated, work the area again to kill the weed seedlings. Be sure to break up the clods in the soil, as seeds planted in cloddy soil will germinate poorly and won't live long because the soil dries too quickly.
- Form soil into beds if desired, and plant while soil is still wet.
Time to plant
Asparagus is a perennial crop that requires two distinct periods--a growing period and a resting period. If drought or cold weather do not stop vegetative fern growth, shoots will become spindly and less vigorous each year. If beds are established with 1-year-old crowns, planting occurs in mid to late winter. For growing your own transplants in a greenhouse, plant seeds in flats 10 to 12 weeks before recommended planting periods.
In the garden, optimum root and fern growth develops with temperatures in the range of 65° to 85° F. Growth is retarded with temperatures below 55° F or above 85° F. For seedling transplants, the ideal greenhouse temperatures are a nighttime low of 65° F and a daytime maximum of 85° F. For direct seeding, the optimum germination temperature is between 77° to 86° F.
| Planting Dates for Asparagus in California* |
North and North Coast
Monterey County north |
January–March |
South Coast
San Luis Obispo County, south |
January–February |
Interior Valleys
Sacramento, San Joaquin valleys |
March–April |
Desert Valleys
Imperial and Coachella valleys |
February–April |
| *Transplants may be started indoors from seed 4 to 6 weeks before the last frost date. Areas are large, so planting dates are only approximate, as the climate may vary even in small sections of the state. Contact your local UC Master Gardener program and experiment on your own to find more precise dates. |
Planting asparagus
Direct seeding is more difficult than planting crowns or transplants. It has been most successful in the southern coastal and desert areas. Germination is slow, requiring a 4 to 5 week germination period at cooler temperatures. If planting during the summer months, young seedlings can be protected with 50% shade cloth or two layers of floating row cover until they have about six leaves. This helps protect from sunburn as well as seedling pests. Plant on raised beds made by adding large amounts of soil amendments so that a bed is established above the previous level of soil. Make beds about 24 inches wide with two rows per bed about 12 inches apart. Dig a furrow 5 to 6 inches deep and plant the seed in the bottom of the furrow about 0.75 to 1 inch deep and 3 to 6 inches apart. When the seedlings are tall enough, pull the soil around their stems and fill in the furrows. This develops deep-rooted seedlings that will have a longer life span than those planted shallowly on flat beds.
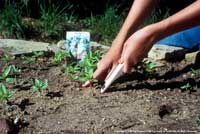
Asparagus can be planted from transplants, roots, or shoots. The best way to transplant asparagus is from 1-year-old crowns available from most nurseries in the winter months. Use only the largest, most healthy crowns. If transplanting in the summer, shade plants in the middle of the day for the first week. Seedlings can be transplanted in the fall. Plant in the bottom of a furrow about 4 to 6 inches deep and 12 inches apart. When planting, place root-side down and fan them out. Cover the crowns with 2 to 3 inches of soil and water in. As ferns develop during the first growing season, begin to fill in the remaining furrows.
Fertilizing
Most vegetables require fertilizer for growth. Organic materials, such as manures and compost, and inorganic materials, such as chemicals, can be used to fertilize plants. Using both types of materials usually provides the best growth. Manures and compost can be used to increase soil fertility. They are usually applied at 1 pound per 4 or 5 square feet. These materials should be worked into the soil several weeks before planting in order to allow it to decompose. Manure that contains straw, sawdust, or similar materials should be applied with a commercial nitrogen fertilizer. Generally, if the soil has been properly amended with compost or manures or other organic materials, the only nutrient needed is nitrogen, if anything. Some commercial nitrogen fertilizers available are urea, ammonium sulfate, calcium nitrate, and ammonium nitrate. Apply these fertilizers at rates of 0.5 to 1 pound of nitrogen per 100 feet of row.
If manure and other organic material has not been used, apply fertilizer that contains both nitrogen and phosphorus before planting. All commercial fertilizers are labeled by the percentages of N-P-K; nitrogen (N), phosphorus (P), and potassium (K). Some common mixed fertilizers are 5-10-5, 5-10-10, 8-16-16, and 12-12-12. Apply these fertilizers at rates of 1 - 2 pounds per 100 feet of row. After plants are 3 to 4 inches tall, sidedress nitrogen in narrow bands or furrows and water thoroughly after application, or apply through the drip system. Consider light but frequent applications of nitrogen fertilizer every 3 to 4 weeks. Avoid letting the fertilizer come into contact with the plant stems to avoid burning.
Application tips
Inorganic fertilizers can be sidedressed. Manures are more difficult to use as a side dressing and must be tilled into the soil.
Banding: Make a small groove an inch or two deep on both shoulders of the bed, 4 to 6 inches from the plant row and band in the fertilizer. Replace the soil and irrigate.
Watering asparagus
Asparagus may be irrigated by furrow or drip irrigation. Avoid wetting the foliage and spears with overhead watering. The frequency of irrigation is determined by soil type and climate. In desert areas, South Coast, and Central Valley, asparagus may be irrigated every 10 to 14 days in spring. In the summer, irrigate every 7 to 10 days. Each irrigation should be long enough to wet the soil several feet deep. In the Delta Area, in coastal valleys, or in the Pacific Northwest less spring irrigations and fewer summer irrigations would be required. Irrigation is usually stopped in September or October so that the plants will go dormant. The ferny part of the plant is allowed to dry down and then is removed before the spears begin to grow the following spring.
Pruning and training asparagus
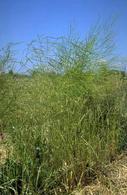
During the first year, do not harvest asparagus spears. Allow all the shoots to grow to fern for the summer. This will build up carbohydrates in the roots and support new spear growth the following spring. After the frost turns the ferns brown or during January if ferns are still green, prune them down to the ground and rake them out. Dispose of the ferns rather than leaving them in the field to avoid overwintering pests. Repeat the process each year thereafter. However, before allowing the plants to fern, you can harvest for a period of time. To conserve garden space, the tall asparagus ferns can be supported on a trellis made of wire.
Harvesting and preparing asparagus
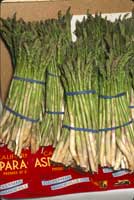
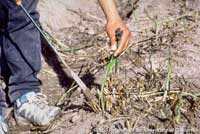
To harvest spears, use a sharp knife and cut the stem at an angle just below the soil line. Prior to cooking, snap the spear where it will break cleanly, then discard the lower portion and use only the tender tips. Asparagus is best eaten fresh. However, it does freeze well for longer storage.
Some gardeners like the gourmet white asparagus. White asparagus is not a variety but is the green asparagus grown without the presence of light. The process is called "blanching." Blanching is done by covering the asparagus bed with heaps of shredded leaves or loose mulch or covering the bed with black plastic. These materials prevent light from reaching the plant as they emerge from the soil and thus the spears remain white. If exposed to light, the spears will become green.
Harvesting tips:
- 1st year: Do not harvest any spears
- 2nd year: During the second season, harvest the spears for a period of 3 to 4 weeks only; if the fern growth was weak the first year, then harvest even less. After the cutting period is over, allow the ferns to grow.
- Later years: During the third year and the years thereafter, cut spears daily or every other day for a period of 8 to 10 weeks; then allow the ferns to develop for the remainder of the growing season. If the spears become small and spindly, harvest for a shorter reason; this indicates that the plants are weakening from over-cropping.
|
 Asparagus after harvest.  Seed bed preparation.  Amending soil to prepare for planting.  Transplanting plants in a raised bed.  Bag of fertilizer.  Irrigation shut off valve.  Mature asparagus plant.  Harvesting asparagus. |


